How to Cook Legumes for Maximum Flavor and Nutrition
Hey there, my leguminous friends! It’s your pal Ksenija. After spending over a decade cooking in professional kitchens around the globe, I’ve learned a thing or two about properly preparing nutritious and delicious legumes and will educate you on how to cook legumes easily and effortlessly.
As an experienced chef, I also love plant-based cuisine, and I’m thrilled to share my tips and tricks for selecting, cooking, and storing beans, lentils, peas, and more. With the right techniques, these humble pulses can transform into crowd-pleasing sides, hearty mains, and crave-worthy snacks.
Let’s dive in and start cooking up some crazy delicious beans!
What are Legumes?
You probably know that beans, lentils, peas, peanuts, and alfalfa are all considered legumes, but what exactly does that term mean? Legumes are plants that produce edible seeds inside pods.
Some common varieties beyond the usual black beans include kidney beans, pinto beans, adzuki beans, mung beans, garbanzo beans, green beans, lima beans, soybeans, fava beans, and, my personal favorite, the underrated lentils.

These little gems pack a nutritional punch! Legumes are great sources of plant-based protein, fiber, B vitamins, iron, potassium, and magnesium. Eating beans and lentils regularly has been linked to reduced risks of diabetes, heart disease, and certain cancers. Plus, they can help lower cholesterol and promote digestive health. No wonder I eat them almost every day!
Dried legumes vs canned
You can purchase legumes either dried or canned. While the convenience factor of canned beans can’t be beaten, and the cooking process is much quicker, I suggest using dried legumes whenever possible. Dried beans retain more nutrients that can be lost in the canning process. They’re also significantly cheaper and let you control the sodium content. With a little planning ahead, simmering up a delicious pot of dried legumes is simple.
Just follow my time-tested process for perfect beans every time. Canned beans still provide benefits though, so keep them on hand for quick meals in a pinch.
Now that we’ve covered the legume basics, let’s dig into the step-by-step process for cooking them to tender, tasty perfection!
Step-by-Step Guide on How to Cook Legumes
Cooking dried beans doesn’t have to be complicated or time-consuming if you follow a few key steps:
Checking for freshness
First up is checking for freshness. Inspect dried beans to ensure there’s no evidence of moisture or bug damage. Give them a sniff – they should have a mild, earthy smell without any sourness.
Washing
Before soaking, always wash dried legumes to remove dirt and debris. Place them in a colander and rinse under cold water. Pick out any stones or shriveled beans you notice.
Soaking
Now we’re ready for the soak! This process helps rehydrate the beans and reduces cooking time. Soaking has also been shown to lower levels of gas-causing oligosaccharides and increase nutrient bioavailability.
Ideally, legumes should be soaked for 5-12 hours in plenty of water, I usually soak overnight, for convenience.
Another method I often do is the quick soak method: Boil beans for 2 minutes, remove from heat, and then soak beans for 1 hour. Soaking times vary based on the type and size of the bean. Refer to the legume cooking chart later in this post for specifics.
Pro tips: Cover soaking beans to prevent evaporation. For extra tender beans, change the water once or twice during soaking. And resist the urge to add salt at this stage – it can prevent beans from softening properly.
Soaking beans drastically reduces cooking time, so I personally always soak dry beans.
Now your legumes are prepped and ready to transform into a delicious dish! Let’s go over cooking techniques.
Cooking
When it comes to cooking beans, low and slow is the name of the game. The gentle, moist heat of simmering enables the beans to become tender and develop their full flavor potential.
Here are some key legume cooking pointers:
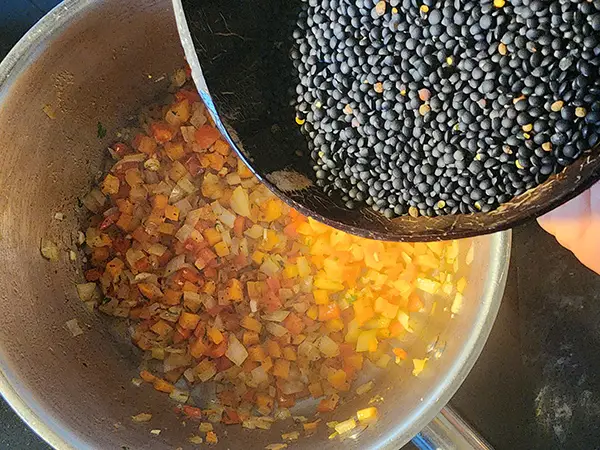
Start with a heavy-bottomed pot and add soaked, drained beans along with fresh water or veggie broth. Make sure beans are covered by a few inches of liquid.
Bring to a boil, then reduce heat and simmer partially covered. Avoid a hard boil which can cause skin to split.
Cooking times range from 30 minutes for lentils up to a few hours for larger beans. Refer to the chart for guidelines.
Test doneness frequently by sampling beans. They should be uniformly tender but still hold their shape.
Add seasonings like herbs, garlic, or acids near the end to avoid toughening beans.
If foam develops, skim it off and add a splash of oil or acidic liquid to reduce it.
Don’t forget to stir occasionally and add more liquid if needed to keep beans submerged.
Follow these tips and your homemade legumes will turn out perfectly plump and tender, never mushy! Now let’s go over a few final steps.
Additional notes on baking soda
I wanted to add a little note about using baking soda when cooking beans. Adding just a small pinch of baking soda to the pot can help soften those beans up faster. The soda helps break down the tough cell walls, reducing cooking time.
I’ve heard some folks say it can cut the cooking time by up to 75%, but in my experience, it’s more like 30-40%. Either way, it gets those beans nice and tender quicker.
But heads up – too much baking soda can make your beans taste metallic or soapy. Yuck! It also destroys some of the B vitamins.
So go easy on it – just 1/2 teaspoon or so per pound (5g/L) of beans is plenty. I usually use this method on unsoaked beans. Note: I would not add to red lentils or other legumes.
Draining
Once your legumes have reached the desired tenderness, you’ll need to decide whether or not to drain off the cooking liquid. Here are a few pointers:
For soups and stews, keep the nutrient-rich liquid as part of the dish. Just give it a taste and adjust the seasoning if needed. (Yellow split peas and lentils make a great split pea soup)
To use beans as a side dish or mix them into salads, drain and rinse them with fresh water. This reduces any sliminess from the cooking liquid.
Compromise by reserving a cup or two of the liquid in case you want to use it for thinning sauces or adding flavor.
When it comes to seasoning, resist adding salt until after the beans are cooked through. Salt can toughen bean skins and extend cooking times. But don’t forget to season it until before it’s completely ready, this gives time for the flavors to mingle and rise but avoids overcooking from seasoning too early.
Seasoning
Let your bean recipes sing with vibrant, balanced seasoning added at the right stage. Now we’ll wrap up with tips for storing your leguminous creations.
Storing cooked legumes
Legumes are versatile ingredients that can be incorporated into recipes right away or stored for later use. Here are some tips for storing cooked beans, lentils and peas:
Let legumes cool completely before storing. Transfer to an airtight container and refrigerate for up to 5 days. Add the cooking liquid for extra moisture and flavor.
For longer shelf life, freeze cooked legumes in recipe-sized portions. Use freezer bags or containers, making sure to remove excess air. They’ll keep for 3-6 months.
Freezing works great for bean soups, stews, and curries. Thaw overnight in the fridge before using.
Drain and freeze individual beans or lentils on a baking sheet before transferring them to bags for use in salads or sides.
When freezing legumes, underseasoned them slightly since flavors concentrate upon thawing. Don’t freeze using salt as this can cause an unpleasant texture.
With proper storage techniques, you’ll have tender, healthy legumes ready to enjoy whenever the craving strikes! Simply thaw and incorporate it into your favorite meals.
Legume Cooking Chart
Here’s a helpful legume cooking chart with soaking times, cooking times, and approximate yields for common dried bean varieties:
Bean Type | Soaking Time | Cooking Time | Yield from 1 cup/100g |
|---|---|---|---|
| Azuki beans | 6-8 hours | 45-60 mins | 2 cups/200g |
| Black beans | 8-12 hours | 60-90 mins | 2.25 cups/225g |
| Black-eyed peas | 5-6 hours | 40-60 mins | 2 cups/200g |
| Cannellini beans | 7-8 hours | 60-75 mins | 2.5 cups/250g |
| Chickpeas/Garbanzo | 12-24 hours | 60-120 mins | 3 cups/300g |
| Great Northern | 7-8 hours | 60-90 mins | 2.5 cups/250g |
| Kidney beans | 8-12 hours | 60-90 mins | 2.5 cups/250g |
| Red lentils | Not needed | 15-20 mins | 2 cups/200g |
| Green lentils | Not needed | 30-50 mins | 2 cups/200g |
| Brown lentils | Not needed | 20-30 mins | 2 cups/200g |
| Lima beans | 7-8 hours | 45-60 mins | 2.5 cups/250g |
| Pinto beans | 8-12 hours | 60-90 mins | 2.5 cups/250g |
| Navy beans | 7-8 hours | 60-90 mins | 2.5 cups/250g |
| Split peas | Not needed | 40-60 mins | 2 cups/200g |
Hope this legume cooking chart comes in handy when planning your next bean-based meal! Let me know if you have any other questions.
Cooking Methods

While gentle simmering is a go-to technique for beans, there are many fun ways to highlight the versatility of legumes.
Boil – Bring a pot of water to a rapid boil. Add pre-soaked beans and boil vigorously for 15-20 minutes until just shy of your desired tenderness. Drain and add to salads, sides, and other recipes where you want beans to hold their shape. Watch closely to avoid overcooking.
Bake – Mix cooked, drained beans with spices, herbs, sauces, binders like egg or breadcrumbs, and any other desired mix-ins. Form into patties, balls, or spoon into a casserole dish to bake. Bake at 375F for 30-45 minutes until heated through and slightly crispy on the edges. Retains moisture well.
Slow stew – Combine beans with veggie stock and aromatic veggies like onion, carrots, and celery. Simmer partially covered on low heat for 1-2 hours, until beans reach desired tenderness. The longer stewing builds deeper flavor. Perfect for hearty bean soups and chilis.
Mash/puree – Reserve the bean cooking liquid, then drain the beans. Mash roughly with a potato masher or puree in a food processor until smooth. Stream in some of the cooking liquid, oil, or tahini to reach the desired dip/spread consistency. White beans and chickpeas work especially well.
Sprout – Soak smaller beans like lentils, mung beans, or adzuki beans 8-12 hours. Drain well and transfer to a glass jar covered with cheesecloth. Rinse 2-3 times per day until sprouts form. Enjoy raw or lightly sautéed to retain crunch.
Ferment – Mix cooked beans with brine (4 Tbsp salt to 4 cups water). Transfer to a sterilized jar, weigh down beans to submerge, and cover with cloth. Allow to ferment at room temp 3-10 days. The longer it ferments, the tangier it gets. Enjoy as a probiotic-rich substitute for sauerkraut or pickles.
From burgers to dips, salads to soups, beans are the ultimate kitchen chameleon. Which cooking method will you try next? Let me know how your legume experiments go!
Pro Tips for Handling Legume Cooking Challenges
Cooking beans often comes with some common pitfalls, but have no fear – there are easy ways to handle them with a few pro tips!

Avoiding excess gas: Gas and bloating are caused by oligosaccharides in legumes. To reduce, start by soaking beans well and changing the soaking water 1-2 times. This helps leach out the indigestible carbs. When cooking, add a 4-inch strip of kombu seaweed, a bay leaf, fennel seeds, or epazote to the pot. Their natural compounds help inhibit gas production. Finally, gradually increase the amount of legumes in your diet to give your gut time to build up the enzymes needed to digest them comfortably.
Dealing with foam: Foam on the surface while cooking legumes is caused by starches and proteins leaching into the boiling water. It’s harmless but can look unappealing. Simply skim off the foam with a spoon and discard it. You can minimize foaming by adding a splash of oil or acidic ingredients like lemon juice, vinegar, or tomatoes early in cooking. Their emulsifying power helps reduce surfacing foam.
Freezing cooked beans: To freeze cooked legumes for longer storage, first let them cool completely after cooking to avoid moisture condensation. Portion beans into recipe-sized freezer bags or containers, flattening to remove excess air. This prevents freezer burn. Thaw beans overnight in the refrigerator before using. Add any seasonings after thawing, as salt can lead to an unpleasant texture when frozen.
Meal prep ideas
Beans and lentils make easy, hearty additions to meal prep. Here are some of my favorite legume meal prep ideas:
Make a big batch of hummus using chickpeas, white beans, or any other bean you like. Change up the flavors each week with different herbs and spices.
Build a hearty lentil salad bowl with your choice of greens, diced veggies, and a tangy dressing. Swap in different vegetables to keep them fresh.
Meal prep chickpea or black bean chili with your favorite spices and toppings like avocado, cheese, or scallions. Freezes great for easy reheat options.
Mix up quinoa and lentils or beans for protein-packed lunch bowls you can customize with sauces and veggies.
If you want more tips and ideas check out my recipes or my guide for meal planning.
Recipe inspiration
Hummus

I love chickpeas and making them in different ways adds so much value to that legume. My favorite is this simple yet flavorful homemade hummus. With just a few ingredients like chickpeas, tahini, lemon, olive oil, and garlic, it comes together in minutes in the food processor. Keep bean cooking liquid for extra moisture.
I love serving it with fresh veggies or homemade sourdough bread for a protein-packed snack or appetizer. The variations are endless – try roasted red pepper, kalamata olive, or other unique hummus flavors.
Check out my Homemade Hummus Recipe
Red Lentil Salad Bowl
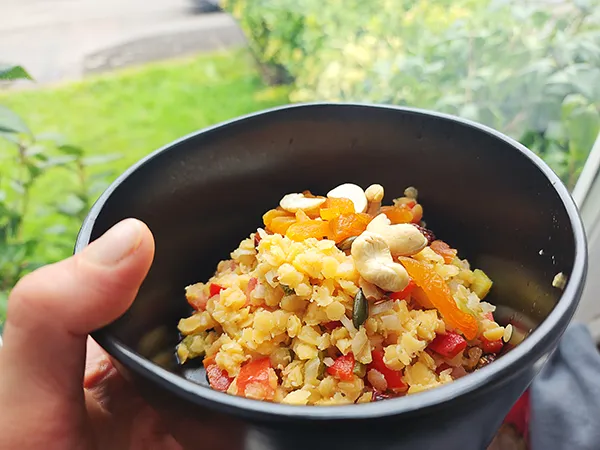
A great source of plant-based protein and a super healthy vegan dish too. I love this simple lentil salad bowl, as it’s so easy to make and you can change up the flavors each time. You can use any kind of lentil, like red lentils, brown lentils, or beluga lentils. Unlike beans cooking lentils will only take 10 minutes, so dinner can be on the table fast. Top your bowl with your favorite fresh veggies, greens, and a tangy dressing.
Check out my Red Lentil Salad Bowl Recipe
Black Bean Burger

Burgers are my favorite food, and I love making a healthier homemade version stuffed with protein-packed black beans. You can swap in any beans you like. With just a few ingredients like beans, breadcrumbs, spices, and egg for binding, these hearty veggie bean burgers come together quickly. Bake or pan-fry them to perfection. I love topping mine with all the classic fixings. A satisfying plant-based meal!
Check out my Black Bean Burger Recipe
Protein Brownie
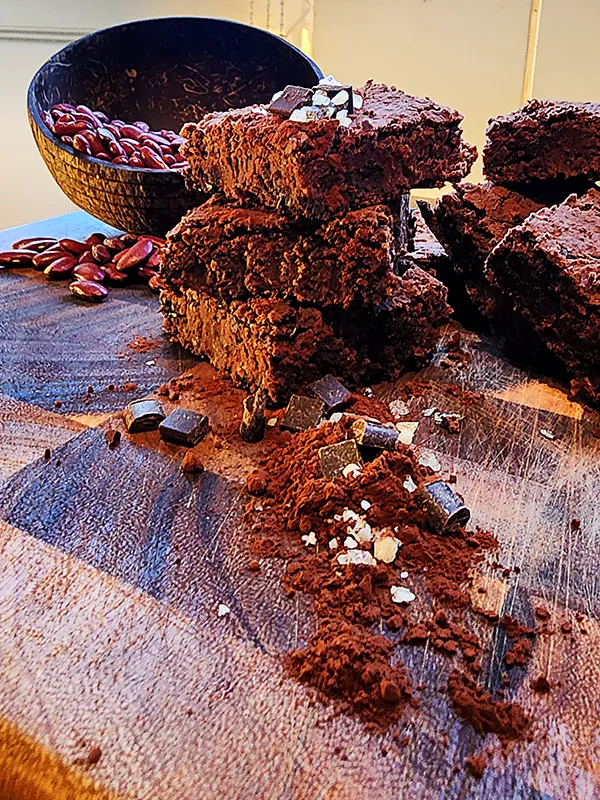
I was so happy to discover this delicious, secretly healthy brownie recipe. With main ingredients like chickpeas or black beans and cocoa powder, it’s an eggless, gluten-free treat that provides a boost of plant-based protein. You’d never guess beans were involved based on the fudgy texture and rich chocolate flavor. I love using chickpeas or black beans, but any bean would work. Combine with chocolate chips for extra decadence. For a satisfying sweet snack that doesn’t compromise on nutrition or taste, you have to try these amazing protein brownies!
Frequently Asked Questions
Should beans/legumes be soaked before cooking?
I highly recommend soaking beans, as soaking reduces cooking time, increases nutrient availability, and reduces gas-causing compounds, and takes zero effort. Because of short cooking times soaking legumes is not necessary.
How do you prepare legumes before cooking?
Before cooking, rinse legumes, and add plenty of water to cover them – they are ready to cook. Most legumes like lentils or split peas don’t need soaking.
How long does it take legumes to cook?
Cooking times range from 20 minutes for lentils up to 2 hours for larger beans. Follow recipe guidelines and cook beans till ready.
What is the appropriate cooking method for dried beans and legumes?
Simmering gently with plenty of liquid is the best cooking method for dried legumes. Avoid boiling vigorously.
Does cooking legumes increase their nutritional value?
Yes, proper cooking increases the availability of certain nutrients like iron, zinc, and protein.
Should you drain legumes before freezing?
Yes, drain before freezing legumes for better texture. Add cooking liquid separately.
What causes foam when cooking legumes?
Foam while cooking is caused by starches/sugars leaching into the water. Skim it off and add oil or acid to the cooking pot to reduce it.
Summary

There you have it! This blog post provides a comprehensive guide to preparing nutritious, flavorful legumes. I explain the health benefits of beans and lentils, then give you tips for selecting, soaking, cooking, seasoning, and storing dried varieties. Helpful charts outline soaking times, cooking methods, and yields for different types.
I share my pro cooking tips, meal prep ideas like homemade hummus and lentil bowls, and mouthwatering plant-based recipes featuring legumes, including protein-packed black bean brownies.
This legume cooking tutorial is perfect for anyone looking to boost nutrition, add versatility to their meal planning, and discover new ways to prepare humble yet mighty beans and lentils, try different beans and cooking methods.
Have a great week, and I hope to see you soon!


